ENTP Mail features an online contact manager that helps users organize and communicate with the people in their life. Users can view and manage their contacts from any computer with internet access, anywhere in the world, using the webmail interface.
To access your contacts, click the Contacts icon. To view or hide different contact lists, such as the Global Address List, shared lists, or mapped resources, simply click the eye icon to the right of the resource name.
Navigating Your Contacts
When you view your ENTP Mail contacts for the first time, chances are they’ll be empty: you won’t have any contacts to display. This may not be true if you’ve migrated to ENTP Mail from another email platform or service. Regardless, the layout of ENTP Mail contacts is the same whether you have migrated contacts or not.
3 Bar Icon
At the top of the folders view you’ll see the 3 Bar icon. This allows you to hide or show the tree view, which is extremely beneficial when viewing your inbox on smaller devices.
Contact Views
In general, the Contacts page is divided into two sections:
- The Contacts view displays all of your contact lists. This includes “Contacts”, which are contacts you add or migrate over to ENTP Mail, and any shared contact lists, such as a Global Address List (GAL).
- Individual cards that represent every contact you have displayed.
Contacts View
In general, the following options are available when viewing all contacts:
- Select – Allows you to select more than 1 contact at a time. To select multiple contacts, click Select and then click on one or more cards. To exit Select mode, click the Select button again. To de-select a contact, simply click on it again. Alternatively, click the down arrow and you’re presented with the following options:
- Select All – Selects all contacts in the list you are viewing.
- Deselect All – Deselects the selected contact(s).
- Send Email – Addresses an email message to the selected contact(s).
- Send vCards – Allows you to send an email with the the selected contact(s) electronic business card(s) (vCards) attached.
- Export to vCard – Exports only the selected contact(s) in vCard format.
- Export to CSV – Exports only the selected contact(s) in CSV format.
- Delete – Deletes the selected contact(s).
- Sort – Sorts contacts by display name, email, or company in ascending or descending order.
- Actions:
- Add to Outlook – Connects Enterprise Email to Microsoft Outlook and synchronizes contact information. Note: This feature is only available in Enterprise Email Pro.
- Import – Allows you to import contacts from another email system into your contact database. Enterprise Email can bulk import contacts in either vCard or CSV format.
- Export all to vCard – Exports all of your contacts in vCard format.
- Export all to CSV – Exports all of your contacts in CSV format.
Individual Contacts
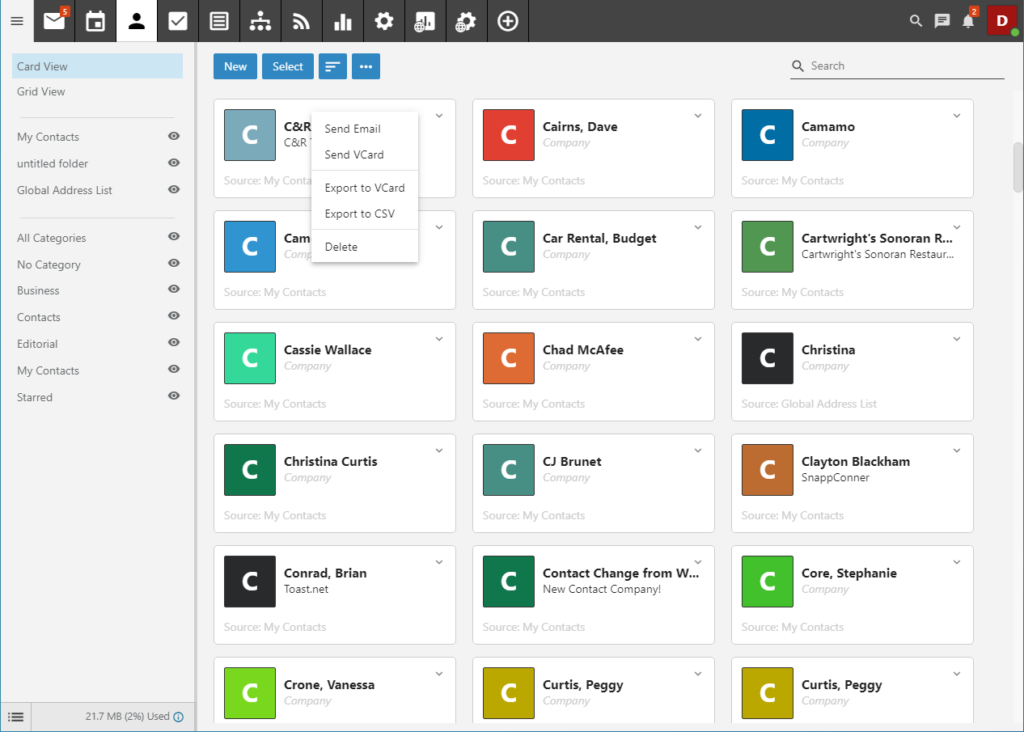
In addition to working with all of your contacts, each individual contact has some actions that are available. To view these, simply click the down arrow, or caret, on each card. When you do, these actions are available:
- Send Email – Addresses an email message to the selected contact(s).
- Send vCard – Allows you to send an email with the the selected contact(s) electronic business card(s) (vCard) attached.
- Export to vCard – Exports only the selected contact(s) in vCard format.
- Export to CSV – Exports only the selected contact(s) in CSV format.
- Delete – Deletes the contact.
Contacts as Trusted Senders
By default, ENTP Mail “sees” any contacts you add as “Trusted Senders.” What that means is that any email you send to, or receive from, a contact bypasses any spam filters that are set up for your domain. While ENTP Mail doesn’t add your contacts to the “Trusted Senders” list you will find in your Spam Settings, they’re handled the same way. However, unlike the email addresses or domains you add to your Trusted Senders list, messages sent to or received from contacts are not counted in any reports that list or detail messages to or from Trusted Senders. Therefore, while a contact is treated like a Trusted Sender, it’s not counted as one in reports.
Sending vCards
ENTP Mail users can send single vCards or multiple, as needed. Below are instructions on sending a single vCard as well as multiple different vCards.
To send a single vCard:
- Go to the Contacts area.
- Find the specific contact in your list, either by scrolling through your contacts or using the Search bar.
- Select the contact, then click the Actions menu. (The down arrow, or “caret” in the top right corner.)
- From the dropdown menu, select Send vCard.
- ENTP Mail will open a new message window with the vCard(s) attached.
- Type the recipient’s email address in the To field and compose a message. Then click Send.
To send multiple vCards:
- Go to the Contacts area.
- Click the Select button. This allows you to select multiple different contacts by simply clicking on them.
- Once you’ve selected the desired contacts, click on the Select button again…which is now the Selected (x) button. (Where x is the number of contacts you’ve selected from your list.)
- From the dropdown menu, select Send vCards.
- Enterprise Email will open a new message window with the vCards attached.
- Type the recipient’s email address in the To field and compose a message. Then click Send.
When sending a vCard, it can be useful to use the Category selectors to help narrow down your contacts. Using Categories as well as the Select button even allows you to send vCards for all contacts in one or more categories.